
Each month, Heather Lahtinen with Weddings by Heather and the Flourish Academy organizes a camera club meetup for local photographers throughout the Pittsburgh area.
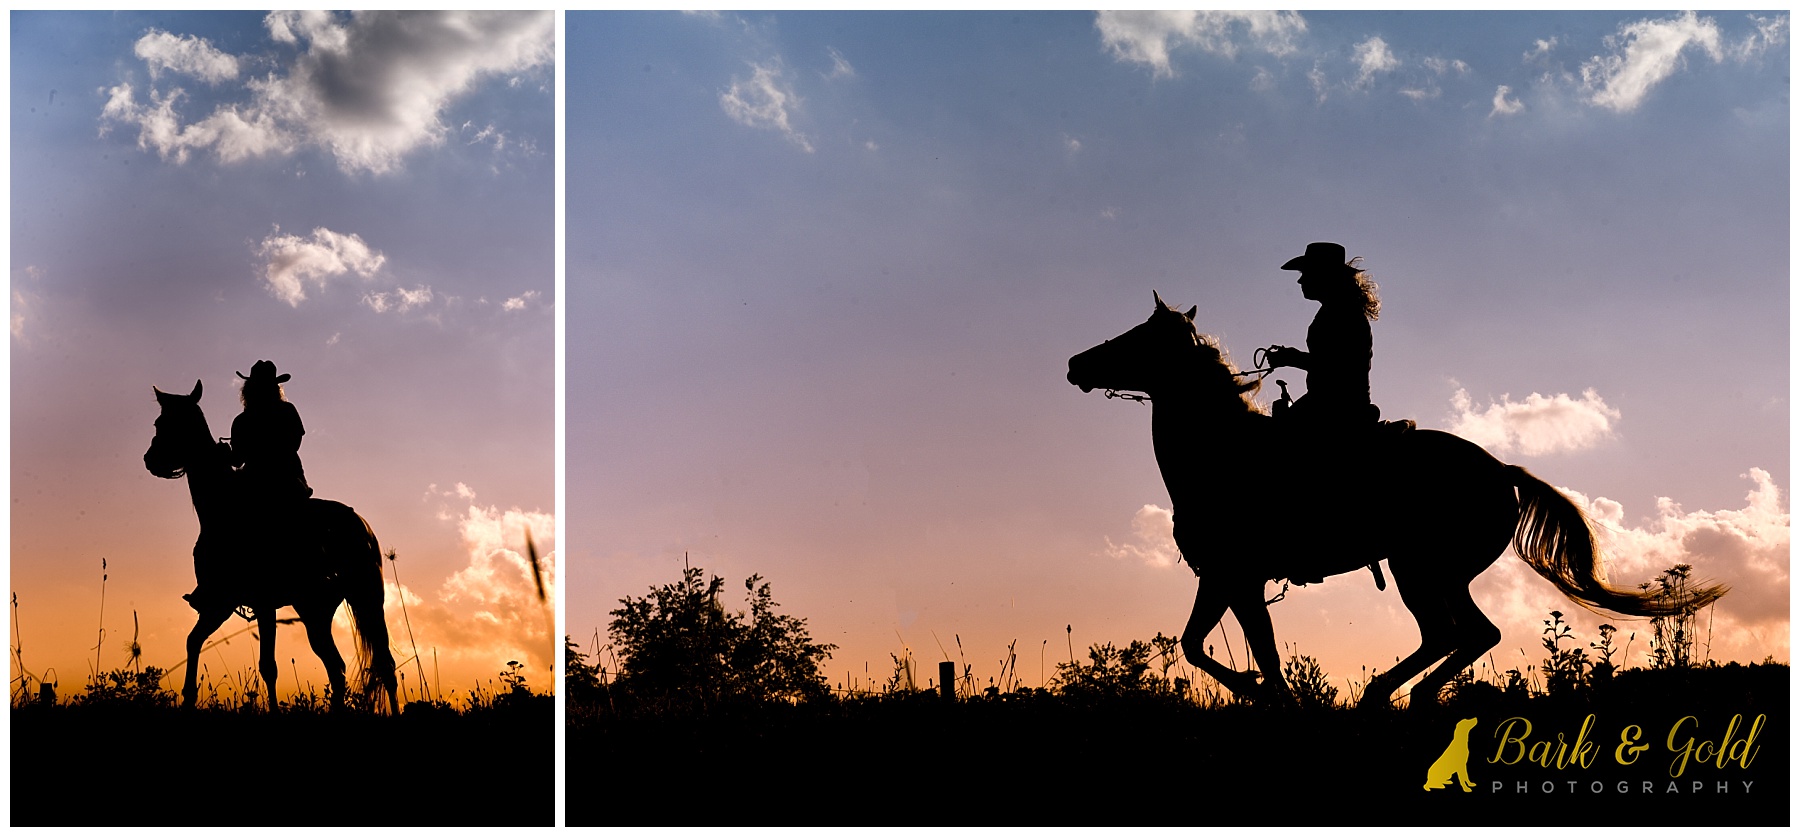
June’s meetup was a horse-centric gathering at my fiend Jackie’s home and barn. With no definite direction outside of photographing the horses, Jackie and I planned to show the other photographers how to capture a silhouette as well as how to create a classic and beautiful black background horse portrait. With Jackie riding her horse Kay, a group of about 30 professional, amateur, and hobbyist photographers trooped into one of Jackie’s pastures and crouched down among the tall grass as I quickly walked through how I do my silhouettes. My Silhouette Sunset Sessions as I call them, which are offered just once a year as part of my Limited Edition Sessions, have become quite popular with Pittsburgh pet parents, so it was fun to watch others learn how easy these are to create–even in full sun and well before the sun dips below the horizon. (It’s simply a matter of having some easy post-processing tricks up your sleeve.)
But in this week’s Pet Photography 52 Weeks Project blog circle, we’re not talking silhouettes, we’re focused on doors, whether they be old doors, new doors, modern doors, sliding doors, barn doors, glass doors, or even car doors! While I was initially stumped at what kind of door I was going to feature for this theme, when we started shooting in the natural light of the barn doors at Jackie’s, I knew this was going to be the perfect post to share how to create a black background horse portrait. (You may remember I first gave this a go during Money’s session last year and wowza–I fell in love!)
Capturing this type of shot is fairly easy in camera, but it almost always requires some post-processing in order to achieve that truly blackened background. If you’d like to give this a type of equine portrait a try, here are a few tips. I recommend starting with this type of shot first as the horse will likely already be in the barn and you’ll be able to slowly warm up the horse to your camera and get a feel for his personality in a space where he’s probably going to feel most comfortable and relaxed.
Take Advantage of Natural Light
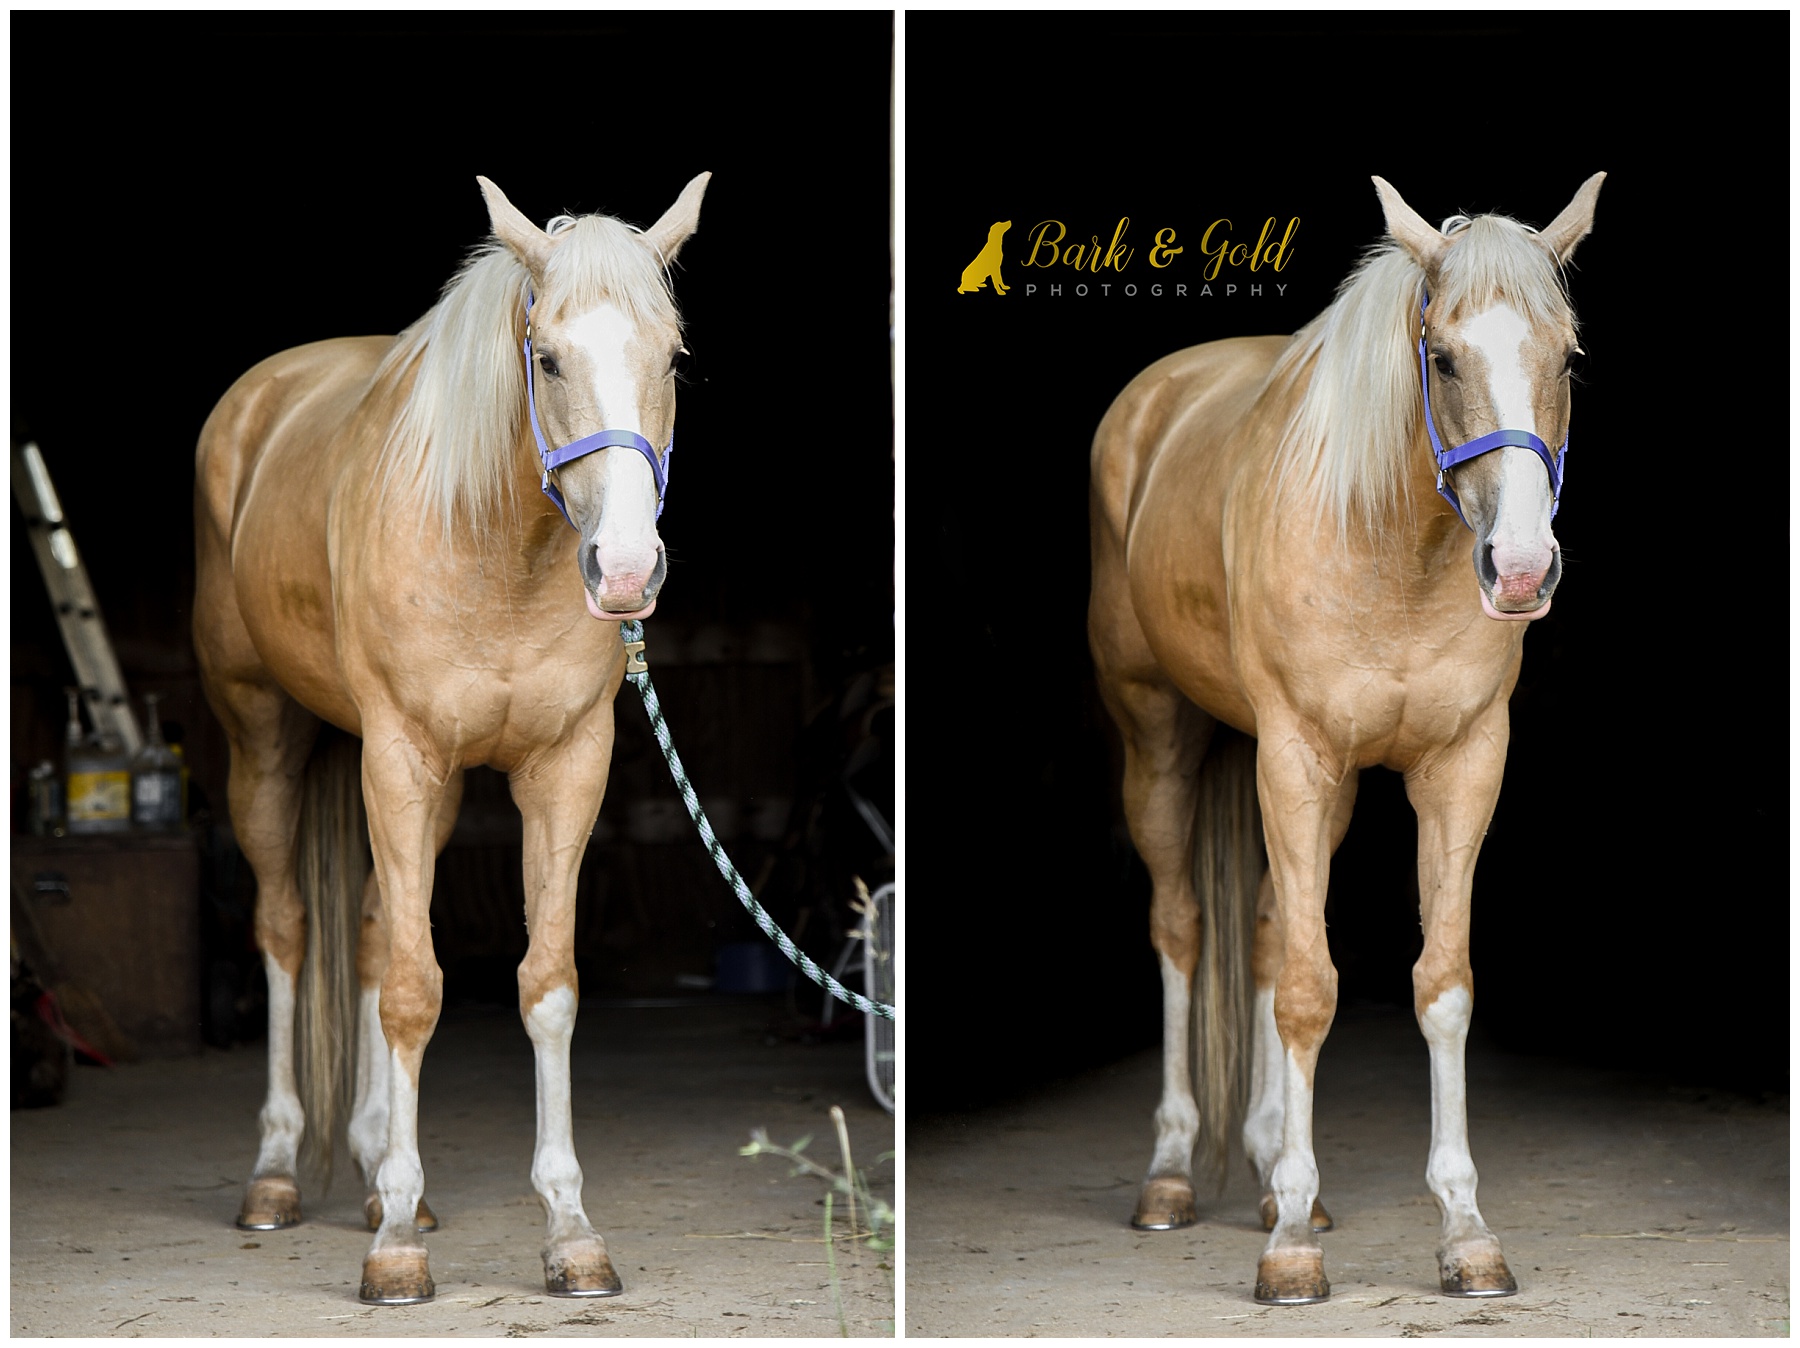
Open shade is the name of the game when it comes to using natural light. I prefer this softer light to more harsh direct sunlight because I feel it illuminates the horse (and rider) just enough. I like to place my subject(s) inside the barn entrance facing toward the open door, as shown below. If you’re photographing two or more subjects, it is important to keep them on as close on the same plane as possible. This will ensure all eyes are sharp and in focus.
Eliminating interior light sources is critical to helping achieve a black background. Doing as much as you can to darken the background while you’re at the barn is a mega time-saver when it comes to post-processing your images. You may find that you need to close additional barn doors, block light from entering through windows, and turn off lights. You can even use your subject(s) to block any bright spots within the barn, but keep in mind that the horse will likely move and adjust a few times while you’re shooting so don’t get too hung up on this if you simply can’t block everything. Minor distractions and bright spots can be easily removed in Lightroom or Photoshop.
Tweak Your Settings with Intention
Be intentional with your settings. I like to shoot black background portraits at about f/4 or f/5.6, but you can go narrower if you’d prefer. A narrower aperture means you’ll get more of your subject(s) in focus. When it comes to setting my exposure, I meter off the subject(s) then underexpose very slightly to help naturally darken the background even further. Depending on the location, my ISO will typically range anywhere from 500-1,000; you will need to take a few test shots to see what works for you and adjust accordingly. On this particular day, I was shooting at ISO 1,000 with the sunlight coming in behind me just slightly over my right shoulder.
I find a fast shutter speed essential when photographing animals. Because I knew these horses weren’t going to be moving much as Jackie held them in place, I shot at 1/500s and f/4 at 105mm.
Post-Processing Your Images
It may be beneficial to mention that I shoot RAW, which allows me to begin working with files that contain more detail in color and range in data. You can still produce beautiful images using a JPEG, but you won’t quite have the flexibility of a RAW image.
When I begin editing a black background portrait, I always start in Lightroom. You will get a solid foundation for tweaking your exposure, highlights, shadows, whites, and blacks here–and now thanks to Lightroom’s range masking feature, decreasing your shadows and blacks on the background only is faster and easier than ever! (In fact, Heather, our fearless Flourish Academy founder and camera club creator, has a great video on using the new range masking feature in Lightroom.)
As I do with most of my images, I start with pulling down ever so slightly on the highlights and blacks and increasing whites and shadows. I also find I need to warm up my subject a tad, so I will temperature and exposure to create a slightly warmer look. Of course, you will have to experiment with this to see what works best for your style.
As tempting as it may seem in your effort to help darken the background, do not just yank down your black and shadows for the whole image when post-processing these. Doing so can create a sharp unnatural edge to your subjects. Keep in mind how light and shadows naturally and gradually fall. You want that look, not a cut-and-paste appearance.
If you do this correctly, you’ll likely notice that much of your background has darkened. Any distractions or unusually bright areas can be removed in Photoshop, which is where I do final cleanup work. (You can also do this in Lightroom if you’re not comfortable with Photoshop yet, but it does add extra time and effort to your post-processing.) I like to use the spot healing brush, content-aware fill, and cloning (you may find you have to adjust opacity on the cloning tool to blend shadows appropriately).
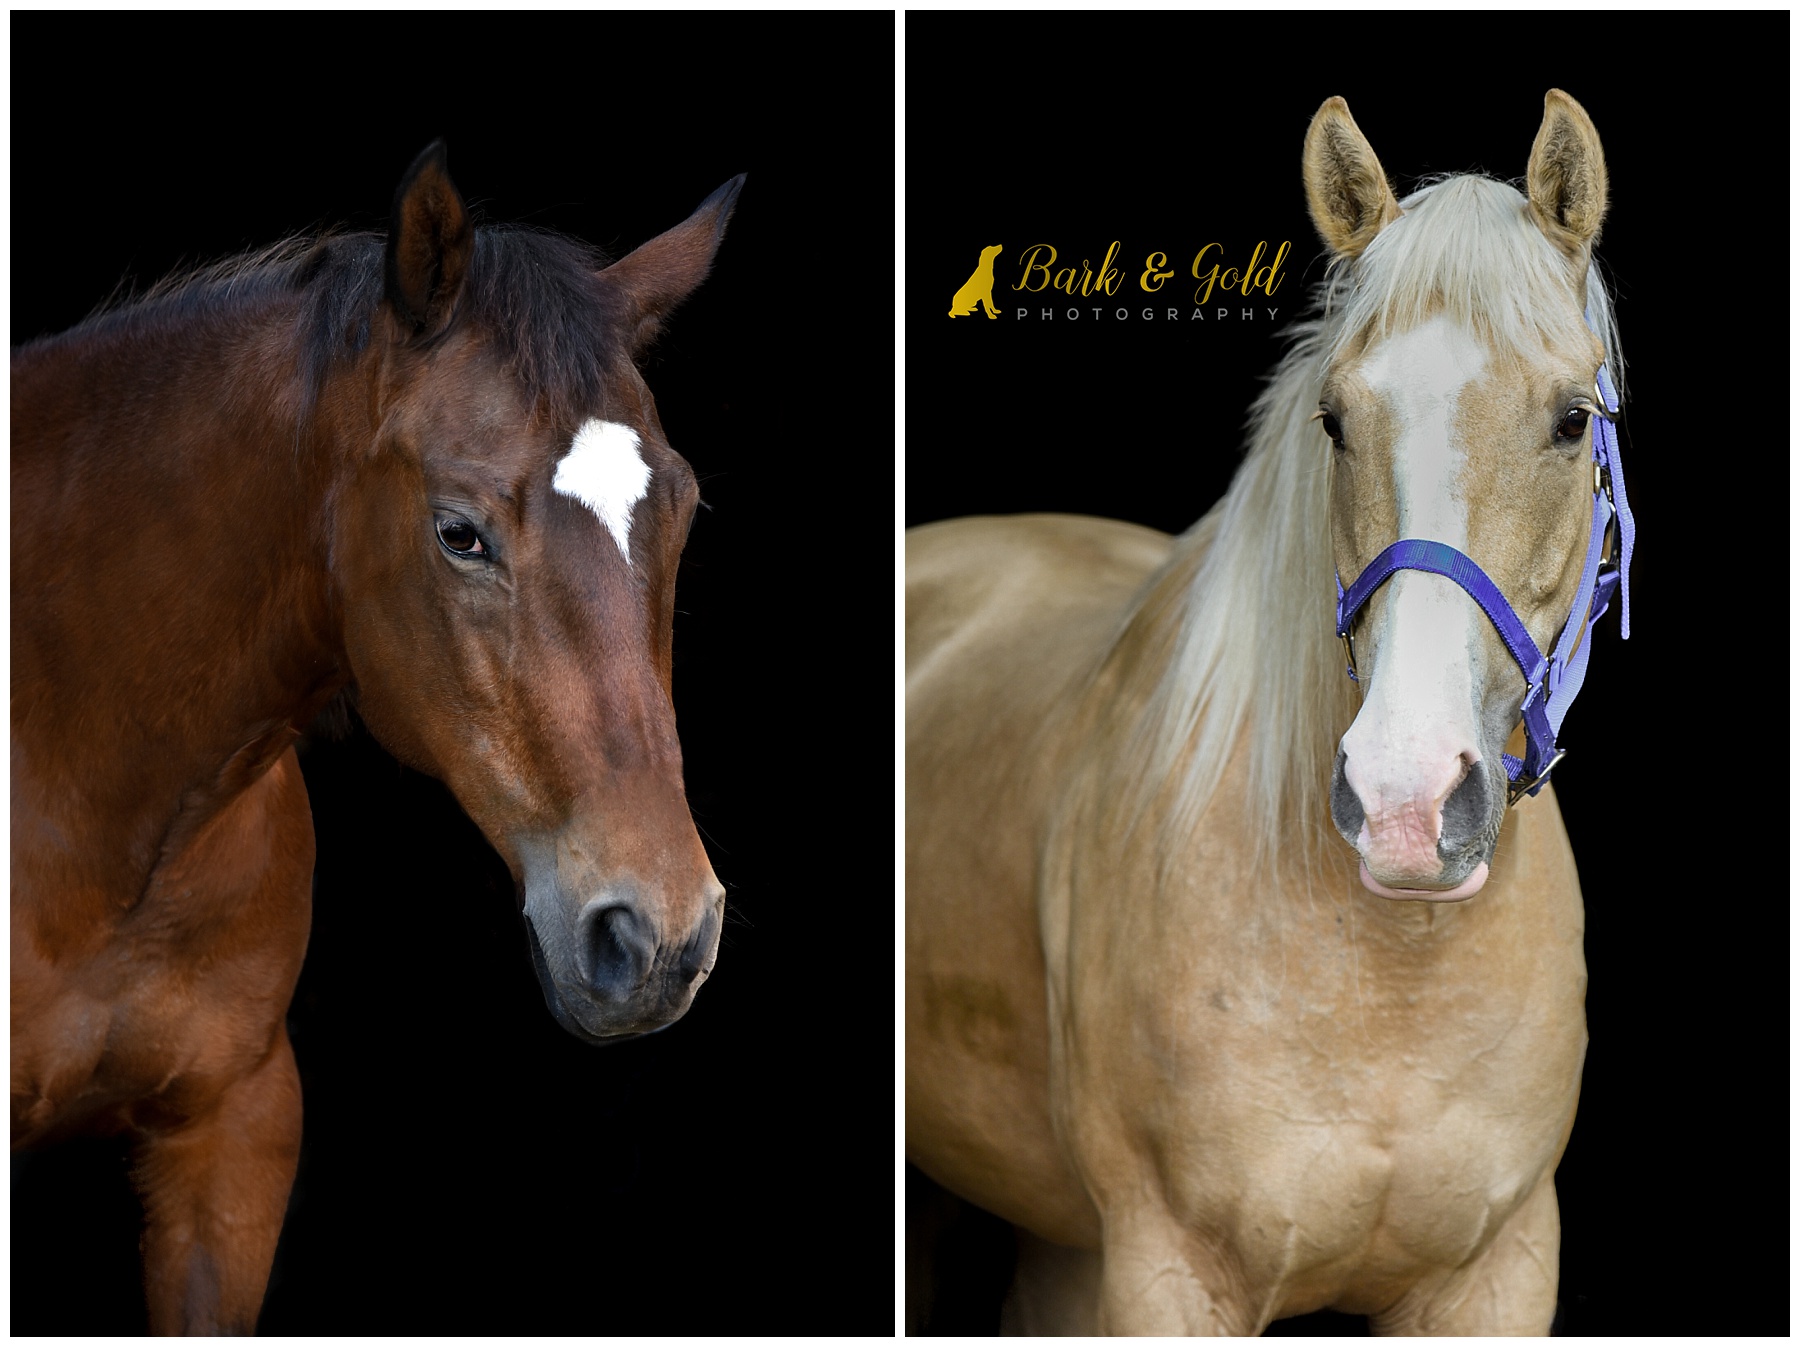
Below are two final black background images taken during this month’s camera club. A big thank-you to Jackie for opening up her home and gorgeous property so we could play and enjoy a finally rain-free evening!
If you’re interested in attending a camera club meeting, the details can be found on the Flourish Academy Camera Club group on Facebook. Click here to join and keep current on upcoming events.
This post is a part of the Pet Photography 52 Weeks Project blog circle. To see what the next pawesome photographer is sharing for the weekly theme, “Doors,” check out Terri J Photography, capturing special moments with your pets in the Toronto and Boca Raton, Florida areas. Continue to click the link at the end of each post in the blog circle until you eventually find your way back here.
Wow, nice job on creating the black backgrounds. Seeing your silhouettes makes me want to find an open space where I live (the land of the trees) to do some!
Thanks, Kim! Pennsylvania (Pittsburgh in particular) is very hilly, but there are tons of trees. I do have my secret silhouette spots though that took me forever to find, so they’re my hidden gems. I offer them in November as a Fine Art Pawtrait Session option; they’re always a hit. You only need a slight elevation and the ability to get yourself slightly lower than your subjects to create them. Go for it!
Lots of great info, thanks Jessica! I’m in envy of your sunset silhouettes.
I absolutely adore the black background horse portrait captured with barn doors in your Pittsburgh equine photography post! The artistry and creativity in showcasing these magnificent creatures are truly commendable. While the visual appeal is outstanding, I couldn’t help but wonder about the impact of incorporating calming feed for horses into the equation. Imagine the blend of artistic excellence and the well-being of the horses, creating an environment where they not only shine in front of the lens but also experience a sense of tranquility with the help of a calming feed. It’s intriguing to think about how this addition could elevate both the visual aesthetics and the overall well-being of these beautiful equines during such captivating photoshoots.
Excellent point! Creating a calm and positive environment is essential for capturing portraits that express how we know and love our animals best!