“Pay no attention to that man behind the curtain!” panics The Wizard in what is one of the most iconic scenes of the 1939 film The Wizard of Oz.
Just as Toto pulls back the green satin curtain to expose the mythical floating head as nothing more than an elderly man tinkering with knobs, levers, and buttons, I’m also pulling back the veil with a glimpse at a complex edit of Osa and the steps I use to take your pet portraits from RAW to the wall.
What’s a RAW File?
As photographers and Adobe.com contributors Nicole Morrison and Jenn Byrne explain in their article, “Shoot RAW vs. JPEG: Which format should you choose?,” “A RAW file is lossless, meaning it captures uncompressed data from your camera sensor. Sometimes referred to as a digital negative, you can think of a RAW file as the raw ‘ingredients’ of a photo that will need to be processed in order to bring out the picture’s full potential. As you might expect, the tradeoff for these detailed files is that RAW files are quite a bit larger than JPEG files. Still, most professional photographers shoot in RAW because it gives them more information to work with in the post-processing phase.”
The Benefits of Shooting in RAW
“All that extra information in RAWs is what gives you the latitude to tweak the white balance and exposure, for example, to a much larger degree than with a JPEG,” adds Morrison. “Higher image quality translates into more available data when it comes to photo editing, giving RAWs a definitive edge over JPEGs. Editing programs like Adobe Camera RAW, Bridge, or Lightroom are built for fine-tuning RAWs into polished final photos.”
Related: Why You’ll Rethink Your Desire for Digital Files
The benefits of shooting in RAW are plentiful, including:
- Providing the highest level of image quality without compression and capturing all data from your camera’s sensor.
- Allowing greater freedom in editing your images, from their white balance to exposure.
- Expanding the dynamic range, or the range of your lightest and darkest tones, such as mid-tones, highlights, shadows, black, and white.
- Enhancing gradations and colors.
- Presenting more defined details and less noise.
“One of the largest benefits of RAW is the ability to recover shadows and highlights in post-processing without bringing in the grainy noise usually associated with high ISO settings. RAWs are very forgiving if you have severely underexposed or overexposed areas,” Byrne elaborates.
While RAWs offer photographers the widest range of information to work with, the tradeoff for this margin does require that more effort be placed on perfecting what will become the final image.
For example, if you look at the adjustment panel on the left of Lightroom’s Develop module, you’ll see the global adjustments I’ve made to the photo of Osa and Alexis, including tweaking its white balance, significantly increasing its exposure, and decreasing the overall highlights and blacks while upping shadows and whites.
From there, having copied these adjustments, I can then click the Paste button beneath the far right panels for a consistent, one-click application to any other photos for which I want to apply the identical adjustments.
Why the Random Scenery-Sans-Dog Shot?
Did you catch that second photo that I synced to the same Lightroom adjustments as the one with Osa and her mom Alexis? Basically an identical image but without the two of them? Good eye, my friend! You spotted a very important part of the process of taking Osa’s straight-out-of-camera image to the final portrait that her parents will see at their ordering appointment.
Uh, Jes? I think you’re missing something…
Not necessarily. Let me explain.
To ultimately achieve the enchanted, flower-filled portrait of Osa, this edit wouldn’t be as simple as just using Content-Aware Fill, the Clone Stamp, or the Spot Healing Brush Tool to remove Alexis. As I set up this shot, I immediately recognized that the beautifully delicate branch of flowers drooping down behind Osa would present a challenge in post-processing, hence the background-only image.
That’s because, from Lightroom, both images are taken into Photoshop where I begin the process of compositing, essentially merging and blending the two photos together.
If I ever ask you to completely move you and your pup out of a spot we were just photographing in, you’re likely to first give me a puzzled look (and that’s all good—I take zero offense to that), but this is exactly why. In certain situations, such as those where it’s simply safer or easier to have you closer to your dog or where a leash will be against a very intricate, repetitive, or detailed background, I don’t want to be the one to move as me remaining in a very specific position ensures that the background, composition, and focus stays identical to the photos I’m taking of your dog in that particular area, even when your dog isn’t in it. It gives me that, for lack of a better description, completely “blank slate” to work with.
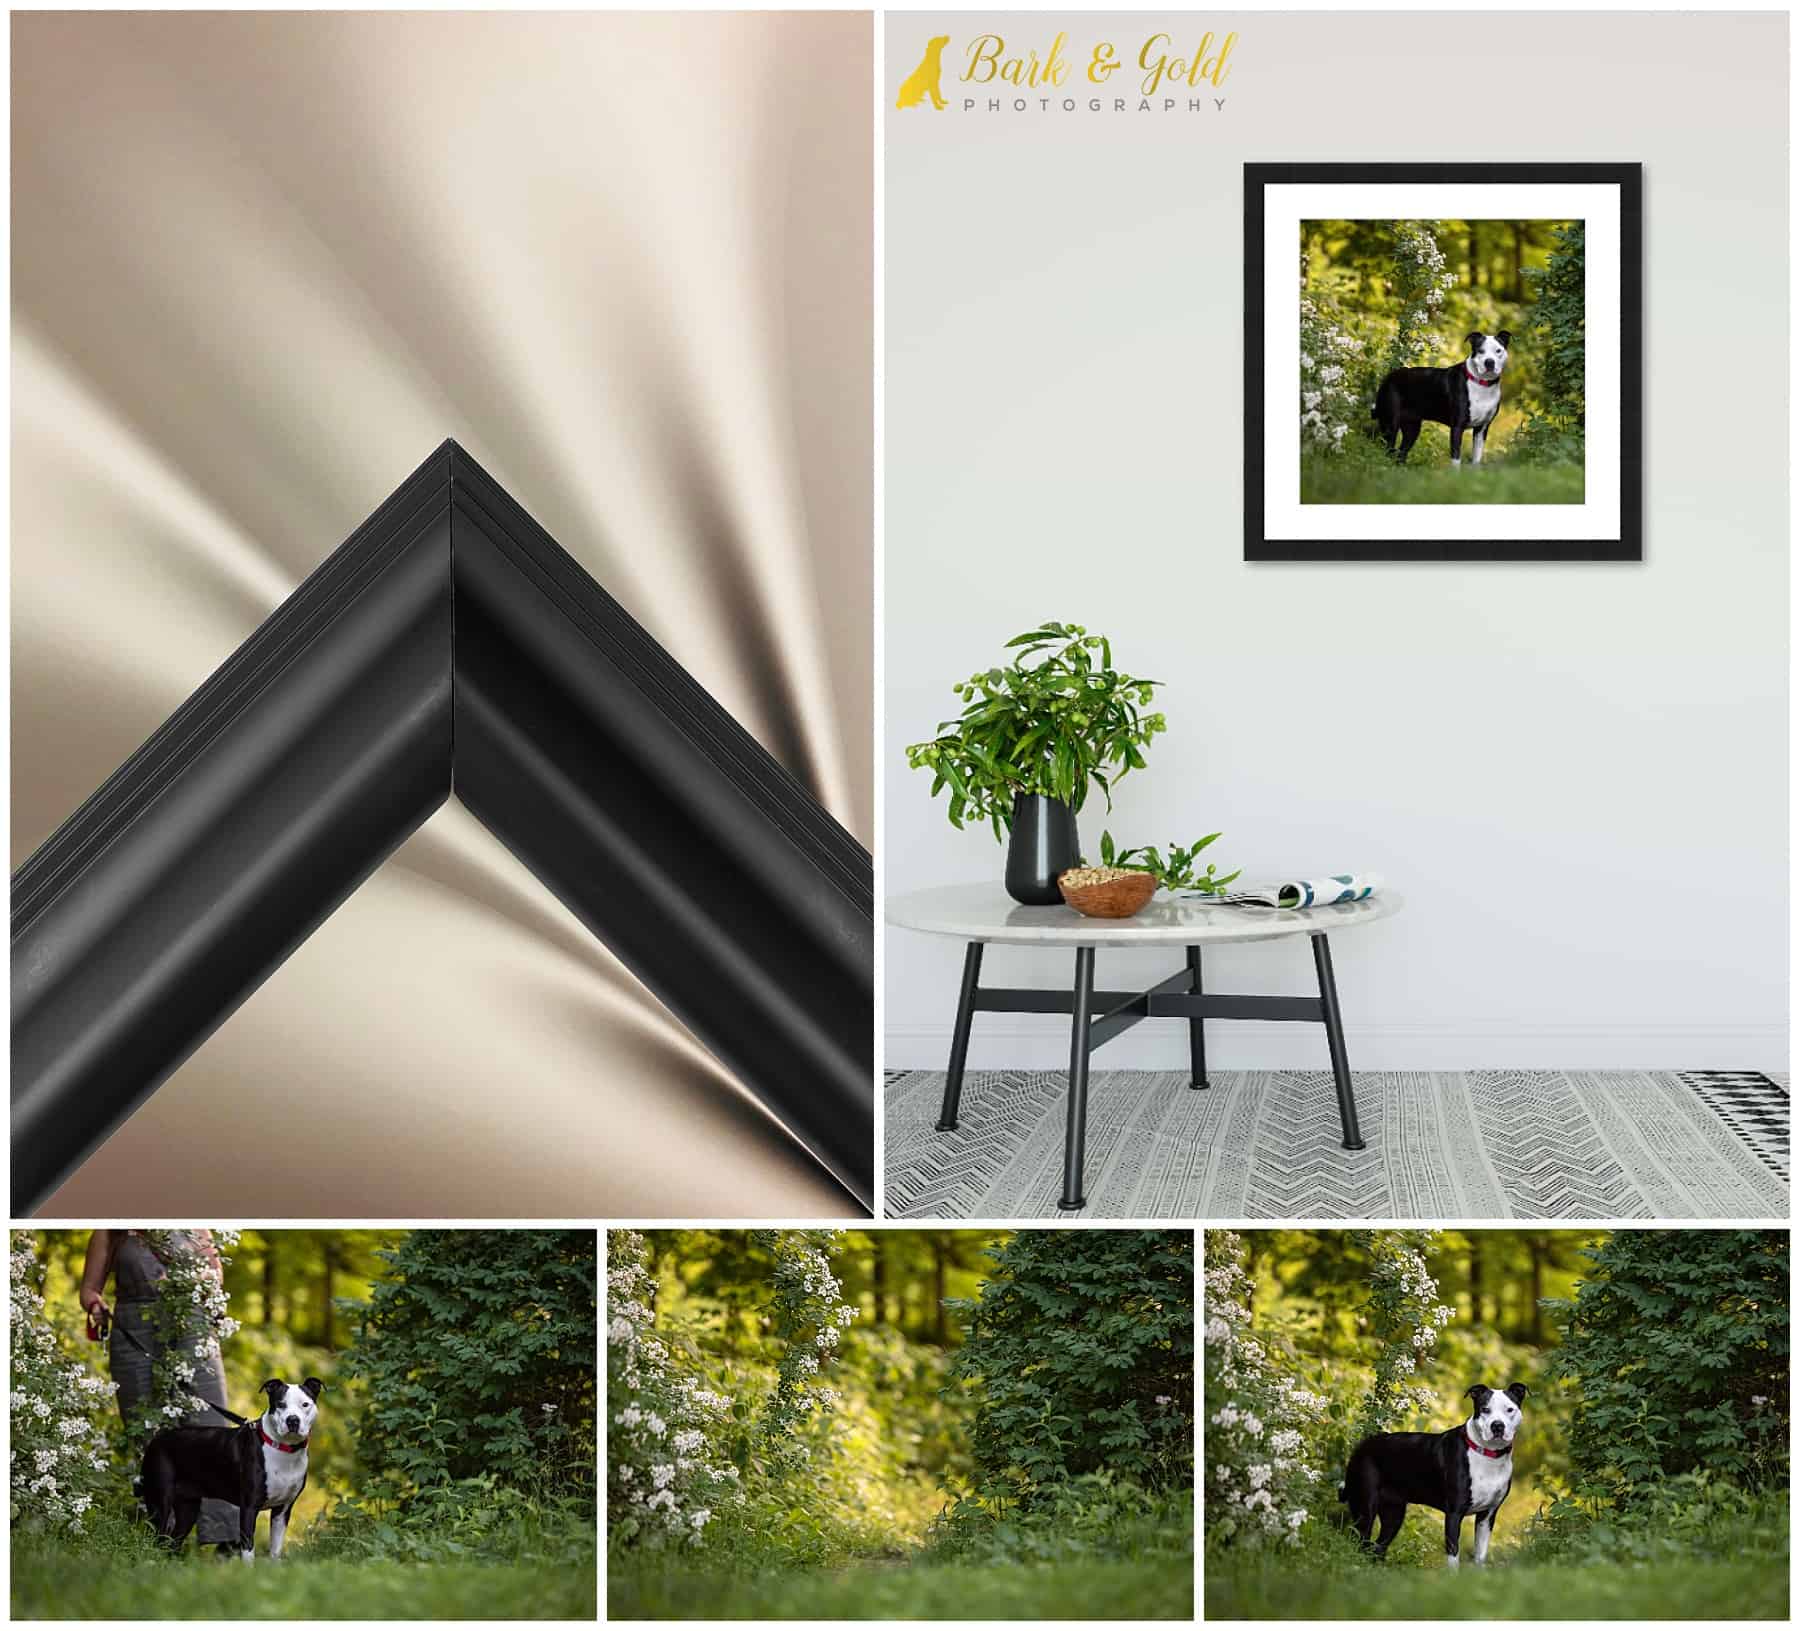
And behind the curtain of Photoshop and with a wave of my Wacom wand, voilà: we’ve got the final portrait I envisioned and what became an obvious frontrunner for one of three traditional framed prints for the walls of this family’s new home!
Are you interested to see how I can work my magic on your pet’s portraits? Let’s connect and bring your vision to reality! Choose your adventure below to begin.
Did you enjoy this post? Great, there’s more coming your way because it’s part of a photography blog circle featuring photographers specializing in a variety of niches! To see more content like this and what the next photographer is sharing for our weekly theme, “Behind The Scenes,” check out Amy Tedrow, owner and photographer of Believe, Create, Inspire, who specializes in commercial, branding, product, and event photography for small business and non-profit organizations. Amy will be sharing behind the scenes, tips, and strategies for creating the perfect product photos for your business. Continue to click the link at the end of each post in the blog circle until you eventually find your way back here.